
Giving Your Vehicle a Fresh Start: The Right Way to Remove a Wrap
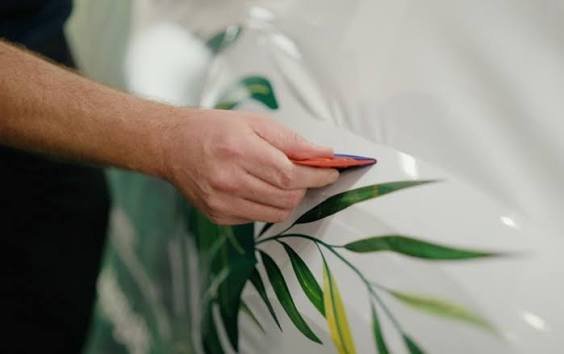
Vehicle wraps are a practical way to change a car’s appearance, promote a business, or protect factory paint from everyday exposure. A well-installed wrap can look impressive for years, but eventually, there comes a time when it needs to come off. Maybe the business has updated its branding, the vehicle is being sold, or the owner simply wants a different look. Whatever the reason, removing vinyl is not a task that should be rushed.
Many people assume that taking off a wrap is just a matter of finding an edge and pulling. Sometimes it is that easy. Often, it isn’t. The age of the wrap, the quality of the vinyl, weather exposure, adhesive strength, and condition of the paint underneath can all affect the process. A careful removal protects the vehicle and makes the next stage—whether that means a new wrap, detailing, or repainting—much easier.
Why Wrap Removal Requires Care
A vehicle wrap is designed to bond firmly to the surface. That is what keeps it from lifting while the vehicle is driven through rain, heat, wind, and dust. However, strong adhesion can make removal challenging, especially when the vinyl has been installed for several years.
Sunlight can cause the material to become brittle. Older vinyl may crack or break into small pieces instead of coming away in broad sections. In other cases, the adhesive may remain strongly attached to the paint even after the vinyl itself has been removed.
The goal is to separate the wrap from the vehicle without damaging the finish underneath. That requires the right combination of heat, pulling technique, tools, and patience. Rushing through the process may leave scratches, adhesive marks, or damaged paint that costs more to correct than the removal itself.
Understanding the Safe Low-Heat Approach
Heat plays an important role in vinyl removal because it softens the adhesive and makes the material more flexible. However, using excessive heat can create its own problems. Paint, plastic trim, rubber seals, and sensitive body components can be affected by high temperatures.
A safe low-heat peel is generally the preferred approach for many vehicle wraps. The material is warmed gradually rather than overheated. This helps loosen the adhesive while reducing the risk of harming the paint or surrounding components.
The vinyl should usually be pulled slowly and at a controlled angle instead of being yanked straight away from the surface. A steady, low-angle pull can help keep the adhesive attached to the vinyl rather than leaving a thick layer behind. If the material starts tearing, the technician may need to adjust the heat, pulling direction, or starting point.
Different sections of a vehicle may respond differently. A roof exposed to years of sunlight might behave unlike a shaded door panel. Installers should pay attention to these differences instead of treating every surface exactly the same way.
Related resource: How to Do Market Research Before Launching a Product
Why Professional Tools Matter
The tools used during removal can make a significant difference. Heat guns or professional warming equipment help control temperature, while plastic scrapers and specialized vinyl-removal tools can assist with stubborn sections. The choice of tool matters because metal blades or sharp objects may scratch the paint.
A professional also knows when not to force a section. If a panel has damaged paint, a weak clear coat, or signs of previous bodywork, the wrap may pull away some of that finish. This does not always mean the installer caused the damage. Sometimes the problem existed before the wrap was applied, hidden beneath the vinyl.
Before removal begins, a careful technician should inspect the vehicle and discuss any visible concerns. This creates realistic expectations and helps avoid confusion later.
Dealing With Adhesive Residue
Removing the vinyl is only part of the job. Once the wrap is gone, adhesive residue may remain across the panels. Some wraps leave very little behind, while older materials or wraps exposed to extreme weather can leave sticky patches that require additional attention.
Proper adhesive cleanup involves using products designed for automotive surfaces. The residue may be softened with a suitable remover and then wiped away using microfiber cloths or other non-abrasive materials. The product should always be tested in a small, less visible area first to ensure it does not stain, dull, or affect the paint.
Aggressive scraping is rarely a good idea. It can create fine scratches that become especially visible under direct sunlight. Strong household chemicals may also damage clear coat, plastic trim, or rubber seals. Automotive-safe products and controlled pressure are much better options.
The amount of cleanup required often depends on the wrap’s age and the conditions it faced. A vehicle parked outdoors in intense sun for years may need more work than one stored indoors and maintained regularly.
Inspecting the Paint After Removal
Once the vinyl and adhesive have been removed, the original paint should be examined carefully. This is the stage when hidden issues become visible. The paint may show fading, oxidation, scratches, chips, or differences in color between covered and uncovered areas.
In some cases, the wrap has protected the paint from sunlight, leaving the covered sections brighter than exposed areas. This can create a noticeable outline where the wrap once ended. Such differences are not necessarily a sign that the wrap failed. They may simply reflect the vehicle’s exposure over time.
Paint condition also depends on how the vehicle was prepared before installation. If the wrap was applied over peeling paint or a poorly cured finish, removal may reveal or worsen those existing weaknesses. That is why a proper pre-installation inspection is so important.
Related resource: Content Marketing Strategy for Small Businesses
When Surface Restoration Is Needed
After removal, some vehicles look nearly as good as they did before the wrap was installed. Others need a little—or quite a bit—of additional work. Dust, adhesive residue, faded paint, and minor surface marks can make the vehicle appear uneven.
Professional surface restoration may include washing, clay treatment, polishing, paint correction, or protective finishing. The correct treatment depends on what the paint actually needs. A simple cleaning may be enough for one vehicle, while another may require machine polishing to improve gloss and reduce light marks.
Paint correction should be approached carefully. Removing too much clear coat can create long-term problems, so the process should be performed by someone who understands automotive finishes. If the paint is severely damaged, repainting a panel may be more appropriate than attempting to polish it back to perfect condition.
Preparing for the Next Step
After a wrap has been removed and the surface cleaned, the vehicle owner can decide what comes next. Some choose to return to the original paint, while others install a new wrap with an updated design. Before applying another vinyl product, the surface should be clean, dry, smooth, and free of residue.
This is also a good time to repair dents, scratches, peeling paint, or damaged trim. Installing a new wrap over unresolved problems may only hide them temporarily and could make future removal more complicated.
If the vehicle is being sold, a clean and carefully restored finish can improve its presentation. Buyers may appreciate knowing that the wrap was removed professionally and that the paint was inspected afterward.
A Careful Removal Protects Your Investment
Vehicle wrap removal deserves as much attention as installation. The process involves more than pulling vinyl from a panel. It requires temperature control, proper tools, careful handling, residue removal, and a realistic assessment of the paint beneath.
A patient approach reduces the risk of unnecessary damage and leaves the vehicle ready for whatever comes next. Whether the goal is a fresh design, a return to factory appearance, or a complete cosmetic refresh, quality removal is an important part of protecting the vehicle’s value and appearance. Sometimes, giving a vehicle a fresh start begins with knowing how to take the old finish away properly.
Related Posts

How to Do Market Research Before Launching a Product
I’ve watched founders spend six months building something beautiful, only to discover nobody wanted it. Knowing how to do market research properly…
Open resource →
Content Marketing Strategy for Small Businesses
Small business owners often assume content marketing strategy is only for big brands with dedicated teams. That’s simply not true anymore —…
Open resource →